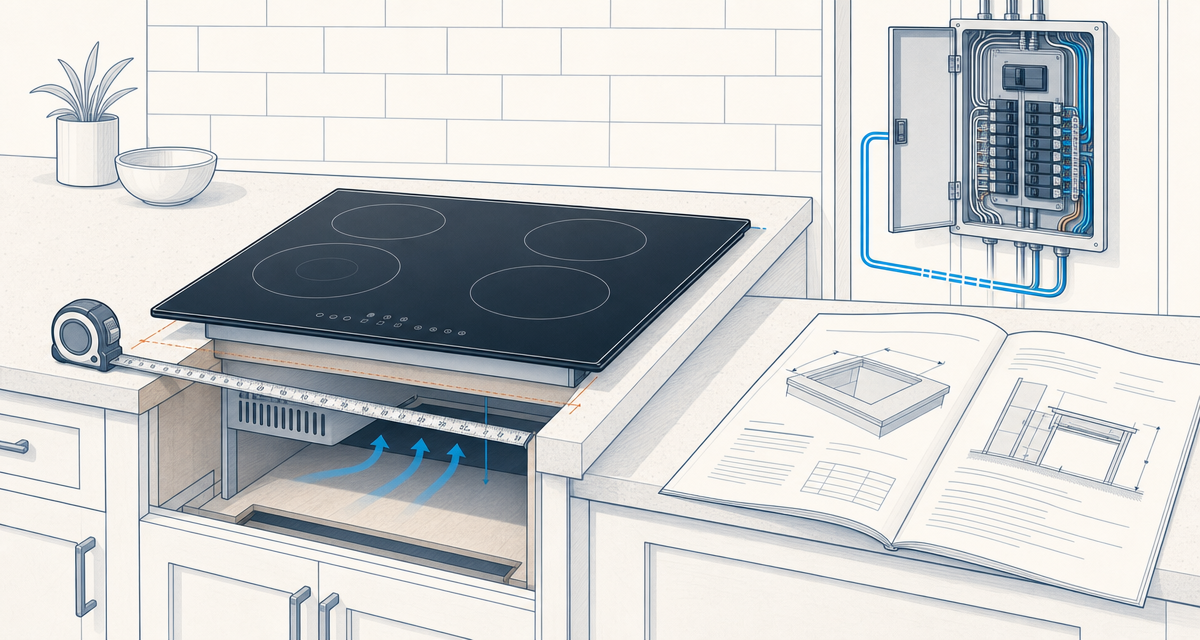
Most built-in induction cooktops need two kinds of planning: a countertop opening that fits the exact model and an electrical connection that matches its nameplate. A same-size replacement on a suitable circuit may be a short job. A gas conversion or a new location can add electrical, gas, countertop, permit, and panel work. Use this checklist to choose the right installation path, compare complete quotes, and avoid buying an appliance your kitchen cannot safely support.
Last reviewed: 2026-09-01 (Pacific time)
Safety note: This is planning guidance, not electrical, gas, code, or tax advice. Have qualified trades and your local permitting office confirm the work for your home and appliance.
Start with your installation path
The work depends on what is behind the existing cooktop, not only on the word “induction” on the box.
| Starting point | Work that may be needed | People commonly involved |
|---|---|---|
| Existing electric cooktop, same-size opening | Verify the circuit, replace the unit, secure it, connect, and test. | Qualified electrician or an installer authorized to make the electrical connection. |
| Gas cooktop or range | Add a suitable 208/240-volt circuit, cap the gas branch, and check the opening and cabinetry. | Electrician, qualified gas professional or utility, and sometimes a countertop fabricator. |
| New location or relocated cooktop | Run a new circuit, modify cabinets or stone, coordinate permits, and plan delivery. | Electrician, countertop or cabinet professional, permitting office, and appliance installer. |
| Portable induction hob | Confirm the product's power rating and use an appropriate receptacle. | Usually no built-in installation; follow the product instructions. |
A built-in cooktop is different from an induction range. Built-ins are often hardwired to a junction box through flexible conduit. A freestanding or slide-in range may use a listed cord and receptacle or an approved conduit connection. Portable units are the common exception designed for a standard household receptacle. Do not plan the connection from a photo of the appliance or a generic 240-volt diagram.
Confirm the model will fit before you buy it
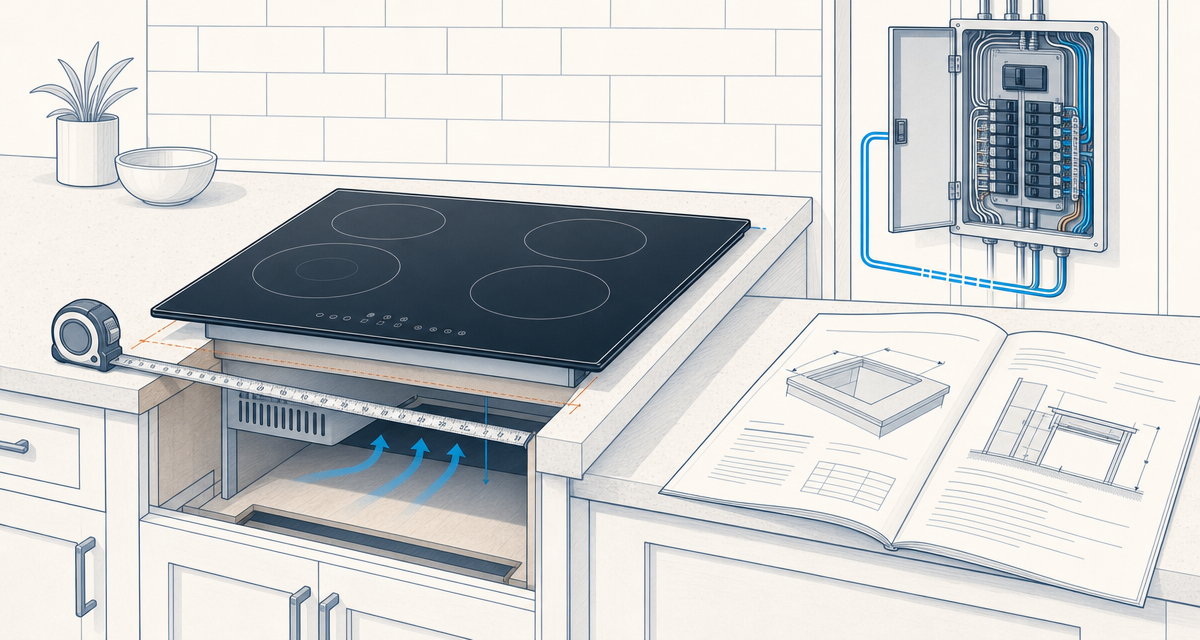
Nominal width is a shopping label, not a cutout measurement. Download the exact installation drawing and measure the opening, cabinet, and connection space before ordering or cutting stone.
Check these items:
- Cutout width and depth. Record the smallest measurements at several points. The glass may be wider than the opening, and a new model may need different edge margins.
- Countertop material. Wood, laminate, quartz, granite, and solid-surface materials have different cutting and support requirements. A stone fabricator should approve any change before delivery.
- Space below. Measure from the underside to a drawer, shelf, or oven. Fans and electronics need the manual's clearances, and loose items can block an air inlet.
- Cooling airflow. Leave every intake, exhaust path, baffle, and heat shield open. This lower air path is separate from the range hood above.
- Wall and overhead clearances. Check walls, backsplash, combustible surfaces, upper cabinets, and hood against the model drawing. A clearance from one brand cannot be reused for another.
- Wall-oven compatibility. Use only a cooktop and under-counter oven combination that the manufacturers approve, with the required separation and ventilation.
- Connection access. Keep the junction box or receptacle reachable for service, with conduit slack or an access panel where specified.
- Mounting method. Use the supplied hold-down or retainer brackets. Flush installations have separate recess and sealing details, so do not improvise hardware or sealant.
If the new opening is smaller than the old one, the countertop may need replacement. If it is larger, a fabricator must remove material while preserving the counter's structural edge. Get that answer before delivery.
Understand the electrical requirements
Full-size induction models commonly use a dedicated 208/240-volt branch circuit, but the breaker is model-specific. DOE describes 40 to 50 amps at 240 volts as a typical planning range, while current manuals also include 30-amp products. The rating plate and manual control.
Ask the electrician to document the following:
| Check | Why it matters |
|---|---|
| Voltage and phase | The appliance may be listed for 208 volts, 240 volts, or both. A panel reading alone is not enough. |
| Breaker and conductor size | The breaker and wire must match the marked load and local code. A larger breaker cannot make undersized wire safe. |
| Dedicated circuit | Many built-ins require an individual branch circuit. A circuit labeled “range” still needs a load and connection check. |
| Hardwire or receptacle | Built-ins often use a junction box. Ranges may allow a listed cord, receptacle, or conduit. |
| Grounding and neutral | Conductors vary by model and by new versus legacy wiring. Never use a gas pipe as a ground. |
| GFCI, AFCI, and disconnect | The locally adopted code determines protective devices and disconnecting means. |
| Service capacity | A whole-home load calculation checks the cooktop alongside other large loads. |
The DOE induction cooking overview distinguishes full-size appliances from portable hobs and explains why a gas conversion may need new wiring or panel capacity. Treat its ranges as guidance, not a model specification.
Does the panel need an upgrade?
A vacant breaker position proves only physical space. It does not prove the service, bus, feeder, or conductors can carry another large load. Have the electrician check the service rating, panel condition, conductors, breaker positions, and load calculation.
If the calculation finds a capacity problem, ask about alternatives before accepting a full service upgrade. A lower-power cooktop, a listed load-management device, or a different circuit arrangement may fit the home's limits. A subpanel adds breaker spaces, but it does not increase the home's total service capacity. If a 200-amp service upgrade is proposed, ask whether the quote includes the meter, service conductors, utility coordination, wall repairs, and inspection, or only panel-side work.
What changes when you replace gas?
A gas-to-induction project has at least two regulated scopes:
- Gas disconnection. Have a qualified gas professional or the utility shut off and cap the branch serving the appliance. The correct location, test, permit, and responsibility vary locally. Do not remove a fitting or leave an unused line open behind a cabinet.
- Electrical supply. Have an electrician design and install the circuit, breaker, grounding, connection box, and any panel work for the selected model. Schedule the circuit before the cooktop arrives.
- Countertop and cabinet fit. A gas opening may be a different shape or size from an induction opening. Compare both drawings, including the chassis depth and below-counter cooling space.
- Gas service decision. If the cooktop is the last gas appliance, ask the utility about service abandonment or meter removal as a separate project. Capping one branch does not automatically remove the meter or close the account.
Keep the gas and electrical scopes on separate quote lines. An appliance delivery crew may remove the old unit, but that does not mean it can alter fixed gas piping, run a branch circuit, cut stone, or pull trade permits.
Follow a safe installation sequence
This sequence describes the decisions and checks. It does not replace the model manual or give terminal-by-terminal wiring instructions.
- Select the exact appliance. Save the installation drawing, electrical table, approved oven combinations, and bracket details before you sign.
- Complete a site assessment. Have the electrician verify or design the circuit. Have the gas professional and countertop fabricator inspect their scopes when you are converting or changing the opening.
- Resolve permits and prepare services. There is no single national residential building code, as the Federal Emergency Management Agency explains. The local authority decides whether the appliance swap, new circuit, panel work, gas piping, countertop alteration, or inspection requires a permit. Complete approved counter work, the electrical run, junction box, and gas capping before delivery. If the job changes the main panel, use the panel-upgrade permit guide to prepare questions for the permitting office.
- Shut off and remove the old appliance. Power must be de-energized and verified before disconnection. Gas work must be isolated by the qualified gas professional. Keep the connection accessible.
- Set and secure the new unit. Check that the cooktop is level, cooling openings are clear, and the supplied hold-down brackets are installed without overtightening. An induction range also needs its anti-tip bracket engaged.
- Connect, test, and document. The electrician completes the connection, grounding, strain relief, protective devices, and disconnect required by the model and code. Test every zone, controls, fan, and breaker. Keep the manual, serial number, invoice, permits, gas-capping record, and incentive paperwork.
If the breaker trips or the cooktop shows an error after installation, turn it off and call the installer or electrician. Repeatedly resetting a breaker can hide a wiring or appliance fault.
Ventilation still matters
Induction eliminates combustion at the cooktop, but cooking still creates particles, moisture, odors, and grease. The U.S. Environmental Protection Agency recommends using a range hood while cooking, venting outdoors when possible, and leaving it on for 10 to 20 minutes afterward. Its cooking-air guidance also suggests using back burners where possible for better capture.
Do not confuse that hood with the fan and air gaps below the cooktop. The hood manages cooking emissions above the surface. The lower openings keep the induction electronics cool. Both paths need to remain clear, and each must meet its own manual and local-code requirements.
How much does induction cooktop installation cost?
Use an itemized budget rather than one “installed price.” Current national cost guides put a ready-site hookup around $400 to $800, before the appliance. A City of Palo Alto electrification guide lists $340 to $3,000 total installed for a small sample of drop-in induction cooktops, with equipment from about $140 to $2,000. These are planning ranges, not guarantees.
| Budget line | Planning range or cost signal | What can move it |
|---|---|---|
| Cooktop or range | Use the exact model's current selling price. | Size, controls, finish, warranty, and whether an oven is included. |
| Physical hookup on a ready site | About $400 to $800 in current national cost-guide estimates. | Removal, access, protection, and whether the installer makes the electrical connection. |
| New dedicated circuit | ENERGY STAR uses about $300 to $1,000 as a planning example. | Run length, wall access, wire, breaker, box, and inspection. |
| Panel or service work | Panel-capacity work can add low thousands. ENERGY STAR examples run about $1,000 to $2,500 for panel work, with more when utility service changes. | Service rating, meter and conductors, utility rules, and other large loads. |
| Countertop or cabinet work | Get a fabricator quote from both cutout drawings. | Stone type, edge distance, flush mounting, support, and cabinet changes. |
| Gas work | Quote shutoff and capping separately. | Pipe location, testing, permits, and any meter or service change. |
| Permit, inspection, haul-away, and repairs | Local fees and scope determine the amount. | Trade count, concealed wiring, re-inspection, disposal, drywall, tile, and restoration. |
A simple replacement may take one to two hours on site. A conversion or relocation takes longer because permits, counter fabrication, gas work, and circuit installation must happen in sequence. A utility service change can add a separate scheduling window. Ask for the earliest date each trade can finish rather than assuming delivery day equals installation day.
Build the budget this way:
Appliance price
+ physical installation
+ electrical work
+ gas work, if any
+ countertop or cabinet work
+ permits, inspection, haul-away, and repairs
- incentives you have confirmed in writing
= cash due and eventual net cost
When comparing bids, keep the gross price and each incentive assumption visible. A contractor's “after rebates” number may combine an invoice discount, a later rebate, and a tax assumption. Watt Wallet's rebate and tax-credit comparison guide explains how to separate those money flows.
Check rebates before you count them
The federal Home Electrification and Appliance Rebate program, called the High-Efficiency Electric Home Rebate (HEEHR) in newer notices, lists an ENERGY STAR electric stove, cooktop, range, or oven with a maximum rebate of $840. Older pages may still say HEAR. Households below 80% of area median income may receive up to 100% of eligible cost; households from 80% to 150% may receive up to 50%, subject to the cap. States may offer fewer measures or no live appliance rebate. See the ENERGY STAR HEEHR overview and the state administrator before you buy.
DOE's Program Notice 26-2, effective May 29, 2026, removed fuel-switching from HEEHR retrofit projects. Once state programs implement it, replacing a gas, propane, or oil appliance with induction generally does not qualify through HEEHR. New construction, electric-to-electric upgrades, and utility programs can follow different rules. Check Watt Wallet's induction stove rebate guide, then confirm the live terms with the administrator.
Do not budget a federal tax credit for a 2026 cooktop installation. The IRS qualifying-property list does not include stoves or cooktops, and the 25C home-improvement credit is not available for property placed in service after December 31, 2025 under current law. A panel or branch-circuit expense is not automatically creditable either; it must meet the tax law's enabling-property rules and timing. Use the current IRS home-energy guidance for tax questions, and keep tax assumptions out of a contractor's net-price line.
Save the model number, ENERGY STAR listing when relevant, receipt, installation invoice, permit, inspection result, proof of payment, and any pre-approval or reservation. A rebate is not secured by a product page or an estimate.
Questions to put in every quote
Give each bidder the same model manual and ask for these answers in writing:
- What exact model, voltage, wattage, breaker, conductor, and connection method does the quote assume?
- Is the existing circuit suitable, or will you run a new one? Show the load-calculation result.
- Does the price include breaker, wire, conduit, junction box or receptacle, grounding, wall repair, testing, permit, and inspection?
- Who pulls the electrical permit and schedules inspection? If the home has gas, who shuts off and caps the branch, obtains any gas permit, and documents the test?
- Does the counter quote use the exact cutout, edge margins, support, flush details, below-counter clearances, and approved oven or drawer combination?
- What brackets, baffles, heat shields, access panels, removal, haul-away, stairs, protection, and cleanup are included or excluded?
- Which incentive does the “after rebate” number assume, who applies for it, and when would the money arrive?
A quote that answers these questions is easier to compare than a lower number with an unclear scope.
FAQ
Do induction cooktops need 240 volts?
Most full-size built-ins use a dedicated 208/240-volt circuit. Portable hobs often use a standard receptacle. Read the exact model's rating plate and manual.
Do I need an electrician to install an induction cooktop?
Use a qualified electrician for hardwired connections, new circuits, panel work, grounding, or protective devices. Retailer packages may exclude wiring, gas capping, counter cutting, and permits.
Can I install an induction cooktop myself?
You may handle non-electrical preparation if allowed locally. Fixed wiring, panel work, and gas piping need trade knowledge and may need licensed professionals and permits. Avoid generic diagrams.
Can an induction cooktop go over a wall oven or a drawer?
Sometimes. All applicable manuals must approve the combination and specify separation, cooling air, heat shield, and service access. A drawer cannot block the fan.
Does an induction cooktop still need a range hood?
Yes. Induction removes combustion, while cooking still produces particles, moisture, odors, and grease. Use an outdoor-vented hood when possible and follow EPA guidance.
Is a 30-amp, 40-amp, or 50-amp breaker required?
Any of those ratings can appear. The nameplate, manual, conductors, and local code determine the circuit. Never increase a breaker without a wire and load check.
Can I claim the $840 federal rebate for a gas-to-induction conversion?
Usually not through HEEHR's retrofit path after DOE removed fuel-switching. New construction, electric-to-electric upgrades, and utility programs differ. Confirm the live program first.
What should I do if the new cooktop trips the breaker?
Turn it off and contact the installer or electrician. Do not reset repeatedly or open the junction box. A qualified person must diagnose the fault.
Bottom line
Treat induction cooktop installation as a fit check, an electrical design, and a trade-coordination project. A same-size electric replacement can be straightforward; a gas conversion or new location needs a written sequence for the electrician, gas professional, countertop fabricator, permits, and inspection. Budget each scope separately and count only incentives you have confirmed.
Before you sign, save the exact model manual, ask for an itemized quote and load calculation, and check Watt Wallet's induction stove rebate guide for the current incentive path.
Sources
- U.S. Department of Energy, Induction Cooking 101.
- U.S. Department of Energy, Program Notice 26-2.
- ENERGY STAR, Home Electrification and Appliance Rebates.
- ENERGY STAR, Make your home electric ready.
- City of Palo Alto, Guide to Electrification.
- U.S. Environmental Protection Agency, Strategies for improving indoor air while cooking.
- Federal Emergency Management Agency, Homeowner building-code FAQ.
- Internal Revenue Service, Energy Efficient Home Improvement Credit FAQs.