Last reviewed: 2026-08-07 (UTC)
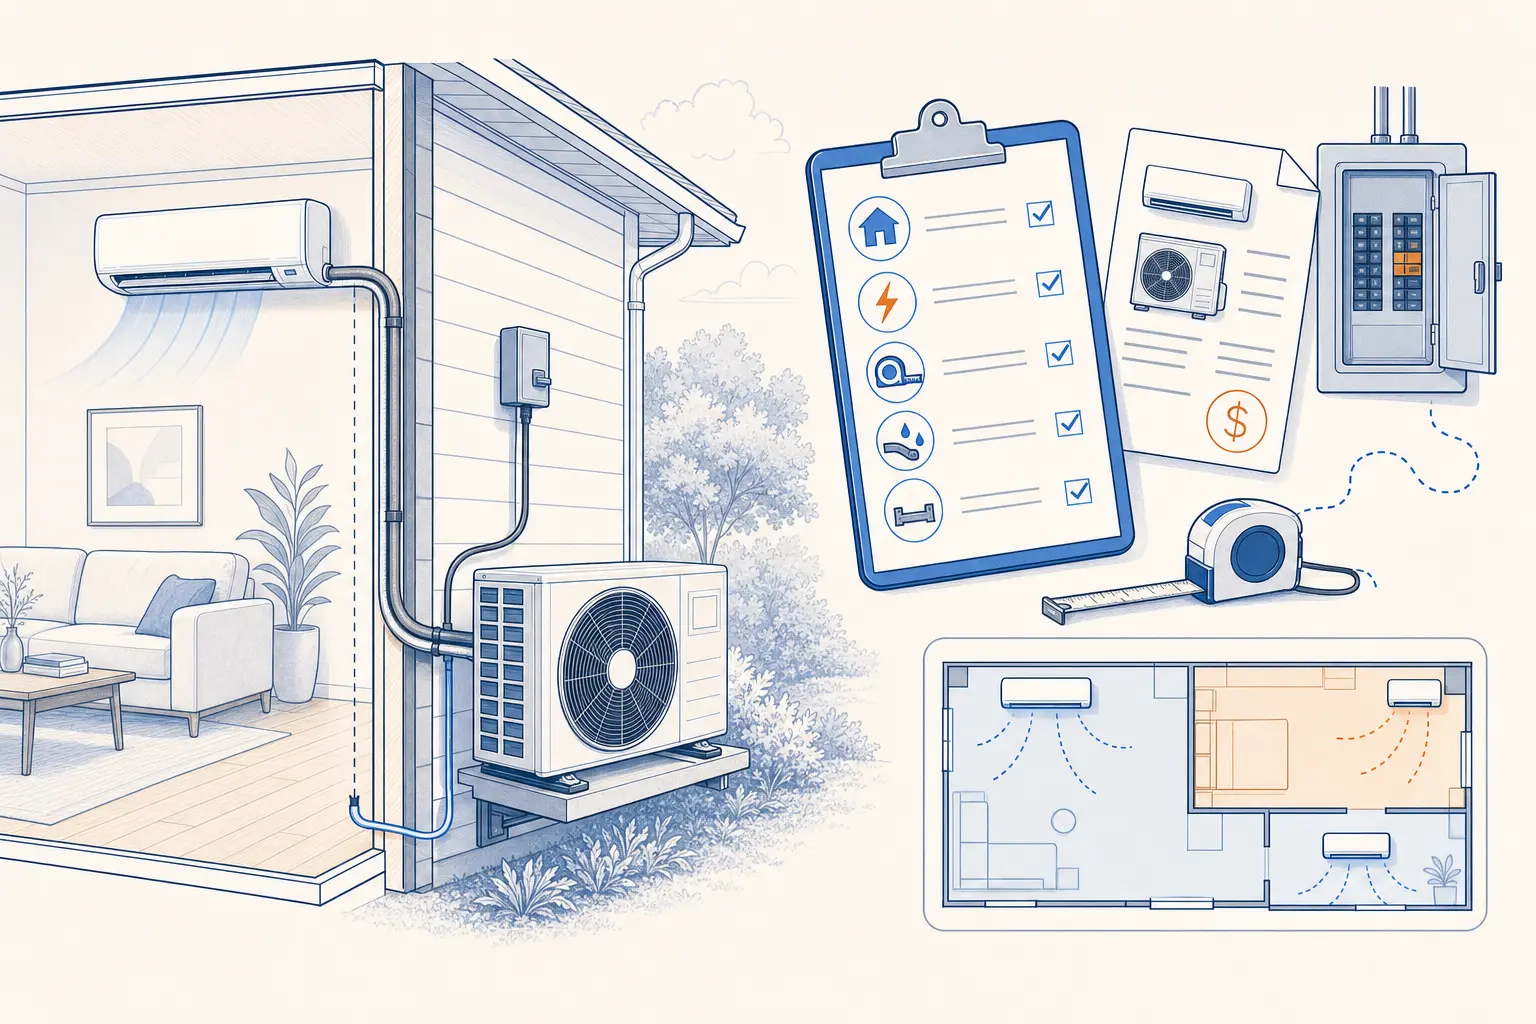
A ductless mini-split installation is usually simplest as a single-zone system on an exterior wall, with a short line-set run, a clean outdoor landing spot, and electrical service that already works for the unit.
Add interior-wall heads, long refrigerant runs, extra zones, panel work, or tricky condenser placement, and the project widens fast. Cost, installation time, and the DIY boundary usually move with placement, electrical scope, line-set path, drainage, permits, and finish work.
For the ductless-versus-ducted choice, use our mini-split vs heat pump guide.
Quick answer
| What you are trying to judge | Practical answer |
|---|---|
| What is the simplest ductless mini-split installation? | Usually a single-zone unit on an exterior wall with a short, direct line-set run, a clear outdoor location, and an existing compliant circuit. |
| What does professional installation include? | Sizing and placement, indoor mounting, wall penetration, line-set and drain routing, outdoor mounting, electrical and disconnect work, refrigerant-circuit preparation, startup, inspection, and homeowner handoff. |
| What does it cost? | Rewiring America gives a broad planning range from $5,000 for a single mini-split to $30,000 for a whole-home system in a large home. This is a planning range rather than a project quote. |
| How long does it take? | Allow about 4 to 8 hours for a straightforward single-zone installation and 1 to 2 days for a typical multi-zone project. |
| What makes the quote grow fastest? | More indoor heads, longer or harder line-set routes, interior-wall installs, electrical upgrades, pads / brackets / stands, finish work, and permit handling. |
| Can a homeowner install a mini split alone? | A pre-charged single-zone kit designed for DIY is the only narrow homeowner lane. Standard refrigerant work, high-voltage work, commissioning, multi-zone systems, and interior-wall routes belong with qualified professionals. |
| Do mini splits usually need 220V power? | Many do, while some smaller systems use 110V or 120V. The exact model decides the circuit requirement. |
| Will the job need permits or an electrician? | The answer depends on the jurisdiction and licenses held. The quote should assign electrical work, permit applications, inspections, corrections, and closeout to named parties. |
| What should you verify before you sign? | The indoor wall and outdoor location, the line-set route, the electrical assumption, the drain path, permit responsibility, and what happens if the scope changes. |
| What is the best next read if the quote includes bigger electrical or budget questions? | Use our heat pump installation cost guide, contractor question checklist, and electric panel tax credit guide. |
Rewiring America's cost model lists upfront costs from $5,000 for a single mini-split to $30,000 for a whole-home system in a large home. Treat that as a planning range rather than a quote. Bryant's installation estimate puts many single-zone projects at 4 to 8 hours and multi-zone projects at 1 to 2 days. Regional labor, equipment, access, electrical work, and site conditions still control the quote and schedule. Our heat pump installation cost guide covers the detailed budget comparison.
Safety boundary: A standard mini-split job includes high-voltage and refrigerant-circuit work. Homeowner planning stops before wiring, refrigerant pressure work, evacuation, charging, and commissioning procedures. Qualified professionals handle those tasks. Electrical licensing, permits, and inspections vary by jurisdiction.
What a ductless mini-split installation actually includes
A real mini-split install is not just hanging one indoor head on a wall.
The DOE mini-split job aid lays out the job in a way that separates mounting and routing from final electrical and trained refrigerant work. In homeowner terms, the professional sequence is:
- Size the equipment and settle placement. Match the equipment to the heating and cooling load, then set the indoor locations, outdoor location, line-set routes, drain paths, and power plan.
- Mount the indoor unit. Secure the mounting plate or other support with the airflow, clearance, and service space the model requires.
- Make and seal the wall penetration. Plan around structure and hidden utilities, then protect and weather-seal the opening.
- Route the line set, control wire, and condensate drain. Follow the agreed path and include any line hide, pump, access, and finish work.
- Place and secure the outdoor unit. Use the quoted pad, wall bracket, roof support, or stand while preserving airflow and service access.
- Complete the electrical supply and disconnect. The party authorized for the electrical scope provides the model-specific circuit, protection, grounding, and disconnect.
- Complete pressure, leak, and vacuum work. A qualified technician prepares the sealed refrigerant circuit and confirms the charge for the installed line length.
- Start and commission the system. The installer confirms applicable operating modes, controls, drainage, and required startup readings.
- Complete inspections and permit closeout. The responsible party coordinates required inspections and clears corrections.
- Walk the homeowner through the system. The handoff covers controls, filters, drainage, warranty records, installer contacts, and permit documents.
That list matters because it shows why the “equipment price” is only one part of the project. The install also includes the path between the units, the power path, and the commissioning work that makes the system safe and efficient.
In homeowner language, think of the job in three buckets:
1. The equipment itself
The project includes the outdoor condenser plus one or more indoor heads.
For a single-room install, that can be a fairly compact system. For a whole-home ductless layout, the same project class starts to look more like a full HVAC redesign than a “small add-on.”
Many residential mini-splits are heat pumps, although cooling-only ductless AC equipment also exists. The same project may be described as ductless AC installation for cooling-only equipment or ductless heat pump installation when the system heats and cools. Our heat pump guide explains how the heating and cooling cycle works.
2. The route between the units
This is where many quotes stop being comparable.
The installer has to route the refrigerant lines, control wire, and drain tubing from the indoor head to the outdoor unit. That route may be short and direct, or it may involve longer runs, more bends, more line-hide, attic or crawl access, wall patching, masonry drilling, or finish work.
3. The startup and safety work
Most standard mini-split systems need professional refrigerant-circuit preparation and startup. The EPA says adding or removing refrigerant and connecting pre-charged lines require Section 608 certification.
That is the part of the job that separates “mounting a unit” from “finishing an HVAC system correctly.”
The jobs that stay simple, and the ones that widen fast
Not every ductless install belongs in the same mental bucket.
The easiest version: single-zone on an exterior wall
A one-room or one-zone install often stays simplest when:
- The indoor head goes on an exterior wall.
- The outdoor unit can sit nearby on a pad or bracket.
- The line-set route is short and direct.
- The drain path is easy.
- The electrical setup already matches the unit.
That is the version of the job most homeowners picture at first.
Interior walls and long runs change the labor
Single units on an exterior wall are usually fairly easy to install, while interior-wall units get more complicated because the piping has to be worked through more finished space to the outside.
That is a helpful homeowner rule of thumb.
If the head goes on an interior wall, ask yourself:
- Where exactly do the lines reach the exterior?
- Will they travel through attic, crawl, soffit, or finished wall space?
- Is patching or paint touch-up included?
- Will the line-hide path be visible on the outside of the house?
This is also where line-set length starts to matter. Installers try to minimize line-set length to support performance. Many systems include a factory charge for a stated line length, and longer runs may require additional refrigerant under the model's instructions.
You do not need to memorize the refrigerant math. You do need to realize that a longer route is not just “more tubing.” It can become more labor, more materials, more finish work, and sometimes more refrigerant.
Multi-zone is a different project class
Homeowners often use “mini split” as if it always means a small one-room project. That is not how the scope behaves.
Single-zone systems are straightforward, while multi-zone setups are trickier because the equipment has to be sized across several rooms and the longer refrigerant runs from one outdoor unit can create real design challenges. In some whole-home layouts, two outdoor units can make more sense than forcing every line back to one spot.
That means a whole-home ductless quote should not be compared casually with a one-room mini-split quote. They are not the same project wearing different labels.
If you want the deeper budgeting side after this page, use our heat pump installation cost guide.
Home and placement checks to make before you ask for quotes
Before you compare quotes, settle these constraints first.
1. Indoor head location
The indoor unit should go where airflow is clear, drainage works, and the unit is away from direct sunlight and obstructions. The location also needs to avoid furniture, lighting, and hidden wall obstructions.
For homeowners, that turns into a short checklist:
- Is there enough clear wall space for the head style being quoted?
- Will furniture, cabinetry, or room layout block airflow?
- Is this the best wall for comfort, or just the easiest wall to install?
- Will the unit be visually acceptable where it is going?
Not every room wants a standard high-wall head. Ceiling cassettes, floor consoles, and short-duct options are also real choices. Those can be useful, but they can also change labor and price.
2. Outdoor condenser location
The outdoor unit needs more than an empty patch of yard.
The condenser should be in a location with adequate airflow and without tight obstructions. It also needs a stable, level mounting surface.
Ask these questions early:
- Is the quote pricing a pad, wall bracket, roof location, or stand?
- Will this location create noise concerns near bedrooms, patios, or neighbors?
- Is service access still easy after the unit is installed?
- In a snow climate, does the unit need to be lifted above expected accumulation?
DOE-funded permitting guidance notes that snow-climate jobs may need the outdoor unit elevated above the snow line. That is a small detail until it shows up as an extra line item.
If outdoor placement may trigger local siting or permit questions, our mini-split installation permit guide goes deeper on that lane.
3. Line-set path and wall / finish work
This is where a clean-looking quote can hide a messy reality.
Ask the installer to show you the exact line path they are pricing:
- Where the line exits the indoor unit.
- Where it leaves the house.
- What will be visible outside.
- Whether line-hide is included.
- Whether any attic, crawl, masonry, or ceiling access is assumed.
- Whether patching, trim, or paint repairs are included.
If the line path is still vague, the quote is still vague.
4. Electrical readiness
Many homeowners treat the mini-split as an HVAC-only quote and leave the electrical assumptions fuzzy. That is a mistake.
Many ductless systems use the 220V/240V supply class, while some smaller systems use 110V/120V. The exact model controls the circuit requirements. A new line from the panel to a disconnect and the unit often brings an electrician into the job, depending on the jurisdiction and licenses held.
The quote should say whether it assumes:
- An existing compliant circuit.
- A new breaker and new run.
- A disconnect.
- Sufficient panel capacity.
- A separate electrician visit outside the price.
If the mini-split quote may widen into panel or service work, our 200-amp service cost guide and electric panel tax credit guide are the right follow-ups.
5. Drainage and weather exposure
The indoor unit still has to drain correctly, and the outdoor unit still has to live in the real climate.
Ask where condensate is going, whether the route is gravity-fed or pumped, and whether the location creates any icing, splash, or pooling risk. Drainage is easy to overlook, and a sloppy installation can create a callback.
DIY vs. professional installation
Mini-splits can look easier than central HVAC because there is no ductwork. That is true. It does not make a standard mini-split a casual appliance install.
Pre-charged DIY kits are designed for a narrower single-room use case. The work still includes structural mounting, a wall penetration, drainage, weather sealing, and often a new electrical circuit. “Pre-charged” also does not erase the federal refrigerant boundary. The EPA says adding or removing refrigerant and connecting or disconnecting pre-charged lines requires Section 608 certification, so the kit's exact connection design matters.
| Project or task | Practical boundary |
|---|---|
| Pre-charged single-zone DIY kit on an exterior wall | This is the only narrow homeowner lane. The equipment must be designed for owner installation, its connection design must keep the owner out of regulated refrigerant work, and local rules must allow the proposed owner work. |
| Standard line set, refrigerant connection, pressure work, evacuation, charging, or commissioning | Use a qualified HVAC professional with the certification and license the work requires. |
| New high-voltage circuit, disconnect, or panel work | Use the electrician or HVAC contractor authorized for that electrical scope in the jurisdiction. The quote should name the responsible party. |
| Multi-zone system, interior-wall head, ceiling cassette, roof location, or long concealed run | Treat this as professional installation. Design, access, drainage, finish work, and commissioning risk rise together. |
| Permits, inspections, corrections, and closeout | Assign each task in the contract according to local rules. For contractor-led work, the contractor should own permits and corrections for its scope unless the jurisdiction requires a different applicant. |
If a contractor says a job is “easy” but the quote still includes custom line-set routing, permits, multiple heads, or a separate electrician, treat it as a real HVAC project.
What usually moves the quote
This is the part most homeowners wish they had before the first bid.
| Scope change | Why it raises cost or time |
|---|---|
| More indoor heads / more zones | Each head adds mounting, wiring, drain routing, refrigerant connections, startup time, and design complexity. |
| Longer or harder line-set routes | Longer runs mean more labor, more line-hide, more bends, more access work, and sometimes more refrigerant. |
| Interior-wall installs | Reaching the exterior can require attic, crawl, ceiling, or wall work that a simple exterior-wall install avoids. |
| New circuit, disconnect, or panel work | Electrician labor, permit scope, and possible service-capacity questions can widen the job quickly. |
| Outdoor pad, wall bracket, stand, or snow stand | The mounting method changes hardware, labor, vibration handling, and site prep. |
| Permit and inspection handling | Permit fees, scheduling, and corrections add time and can expose missing scope. |
| Line-hide, trim, siding, masonry, or paint repair | Cosmetic and envelope work is often where “small extras” stack up. |
| Condensate pump or awkward drain path | If gravity drainage is not easy, the install may need more parts and routing work. |
The homeowner lesson is simple: zone count, line-set length, electrical upgrades, mounting requirements, and permits are not side details. They are core pricing drivers.
How to read a ductless mini-split quote critically
Before you approve the job, try to get clear written answers to these questions.
1. What exact equipment and zone layout am I buying?
The quote should list the outdoor unit and each indoor unit model, plus which room or zone each head is intended to serve.
Brand name alone is not enough.
2. Which wall and outdoor location is this price based on?
Do not assume the installer priced the same layout you are picturing. Ask them to show the exact indoor wall, outdoor unit location, and line path the quote assumes.
3. What line-set length is included?
If the route ends up longer than expected, what changes? More labor? More materials? More refrigerant? More finish work?
That question is especially important on interior-wall and multi-zone jobs.
4. What electrical work is included, and what is still open?
The quote should say whether it includes the breaker, disconnect, conductor run, grounding, and any panel work.
If the answer is “existing electrical assumed,” ask what happens if that assumption is wrong.
5. Are permits and inspections included?
Ask who is pulling the permit, who is scheduling the inspection, and whether permit closeout is part of the contract. If the answer is vague, use our mini-split installation permit guide before you let the issue slide.
6. What startup and warranty-safe commissioning is included?
You want the quote to cover the final pressure / vacuum / leak / startup work clearly, not imply that the physical install is the whole job.
7. What would create a change order?
Ask this plainly. Good answers usually mention things like hidden electrical issues, a longer-than-expected line route, wall / ceiling surprises, condensate problems, or permit corrections.
If you want a stronger bid-comparison process after this page, use our contractor question checklist. If the proposal already subtracts incentives, cross-check that math with our rebate and quote guide, heat pump tax credit guide, and state rebate guide.
FAQ
How much does ductless mini-split installation cost?
Rewiring America gives a broad upfront-cost planning range from $5,000 for a single mini-split to $30,000 for a whole-home system in a large home. It is not a quote for a specific installation. Capacity, brand, zone count, line-set path, electrical work, outdoor support, permits, and finish work move the final price. Our heat pump installation cost guide has the detailed budget ranges.
How long does mini-split installation take?
A straightforward professional single-zone installation commonly takes 4 to 8 hours. A typical multi-zone installation takes 1 to 2 days. Concealed routes, panel work, difficult penetrations, roof access, and inspection scheduling can extend that timeframe.
Is ductless mini-split installation difficult?
Yes. A standard installation combines equipment sizing, structural mounting, wall and weather-envelope work, condensate drainage, high voltage, refrigerant-circuit preparation, commissioning, and code compliance. A direct exterior-wall DIY kit only narrows part of that scope.
Can I install my own ductless mini split?
Sometimes with a pre-charged single-zone kit designed for DIY. Its connection design, instructions, federal refrigerant rules, and local permit and electrical rules still limit owner work. Standard systems, multi-zone systems, and interior-wall runs belong with qualified professionals.
Is DIY mini-split installation legal, and do I need a permit?
There is no nationwide yes-or-no answer for the whole installation. EPA Section 608 sets the federal refrigerant boundary. State and local rules control contractor licensing, owner work, mechanical and electrical permits, inspections, siting, and closeout, so the required permit package varies by jurisdiction. Our mini-split permit guide covers that process in detail.
Do I need an electrician for a mini split?
The electrical scope needs a person authorized to perform it. Depending on the jurisdiction and licenses held, that may be the HVAC contractor or a licensed electrician. The quote should name the responsible party and include the required permit and inspection.
Does a mini split use 110V/120V or 220V/240V?
Both equipment classes exist. In U.S. conversation, 110V/120V describe one nominal supply class and 220V/240V the higher class; equipment nameplates may say 115V or 208/230V. The exact model controls the circuit requirements. Voltage alone does not determine operating cost.
Who is responsible for pulling the mini-split permit?
Local rules decide who may apply, and the contract assigns responsibility between homeowner and contractor. For contractor-led work, put permit applications, inspections, corrections, and closeout for the contractor's scope in the contract unless the local process requires an owner application.
What makes a ductless mini split install expensive?
The biggest quote movers are usually extra heads, long or awkward line-set routes, new electrical work, pad / bracket / stand decisions, permit handling, and finish work. The box price is only part of the total.
How far can the indoor unit be from the outdoor unit?
It depends on the manufacturer and model. Some systems allow very long line-set lengths, but most real installs are much shorter. As the run gets longer, labor, materials, and sometimes refrigerant needs can increase, so longer distance is not “free flexibility.”
Can a mini split go on an interior wall?
Yes, but the job is often harder because the lines still have to reach the exterior. Interior-wall installs can mean more concealed piping, more finish work, and a less predictable quote than an exterior-wall install.
Bottom line
If you want to install a ductless mini split without expensive surprises, plan around the path, not just the product.
The best quote explains:
- Where the indoor and outdoor units are going.
- How the line set will get there.
- What electrical work is assumed.
- Who handles permits and startup.
- What would change the price later.
That is the difference between “I bought a mini split” and “I approved a full installation scope I actually understood.” Before signing, use our contractor question checklist to put those commitments in writing.